Application Description

1.The leakage can be repaired without special treatment on the surface of the pipeline. Thin wall and thick wall pipes can be applied. The installation is simple and the construction cost is greatly reduced.
2. The customer has some special requirements for the product that can also be designed and manufactured.
3.Product design and manufacture in accordance with ISO9001: 2008 system. we use SS304 material as the main body of product, surface corrosion materials is authenticated by WRAS certification, making it suitable for drinking water.
4.We provide gaskets of EPDM, NBR, and SBR, bolts and nuts of carbon steel and stainless steel, etc., long-term anti-rust protection. For this product we provide excellent protection from transportation, warehousing, anti-corrosion at site.Because this product can be connected to different pipe diameter pipeline, it can reduce your investment in the inventory.
Installation Manual
 |
 |
 |
 |
1. Check whether some of parts is missing in transport. Pay attention to the location of the leakage point, it is best to avoid sealing at the overlap of the rubber plate
2. Check the diameter and scope of the pipe and check the type of models, to make sure use the right products. And thoroughly clean the surface of the pipe that will use the clamp. Wrap the rubber sheet evenly around the pipe.
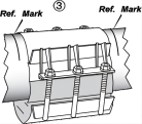
3. Remove the nuts from the bolts, but do not remove them and clip the clamps onto the pipe. The center of the clamp is aligned with the location of the pipe to be repaired, and the appropriate gasket lubricant is applied to the roughened pipe to ensure that the product is well sealed.
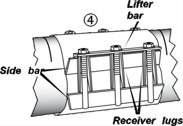
Insert the bolt into the guide plate, insert the plate into the bolt and seize the support plate.”
4. Make sure that the gasket is not folded and tiled on the pipe surface and tighten the bolts to ensure that the cracks and holes in the pipe are repaired by the worker. Screw in gasket, nut and cross lock nut.
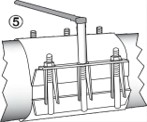
5. Tighten all nuts evenly to each 20 lb / ft of torque increment, at first the center of the tightening nut, and other parts of the nuts, tighten all bolts after several guarantee torque to meet the requirements. In order to achieve better sealing effect, wait ten minutes later, please tighten the bolts again.


