




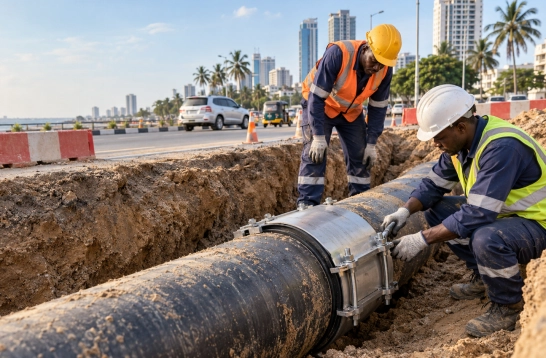
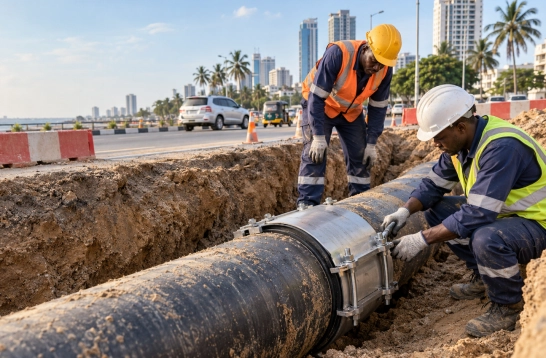
A leak on a buried ductile iron main in Dar es Salaam rarely arrives at a convenient time. The pipe may run beneath a busy road. The next demand peak will not wait.
The World Bank reported a non-revenue water rate of 53% in 2015/2016. A sound repair cannot solve the whole problem. It still prevents avoidable loss. Buried ductile iron water pipes often suffer pinholes, longitudinal cracks and joint leaks. Selecting the correct ductile iron pipe repair clamp or coupling is critical for safe, long‑term pipeline restoration. This guide walks you through site inspection, damage assessment, product selection and field installation.
Why Damaged Ductile Iron Pipes Need a Structured Repair Plan
A generic clamp is not a repair plan. Outside diameter may differ from nominal DN. Damage can extend beyond the wet spot. Pressure surges can enlarge a modest split.
The repair must also suit the medium. Water and oil impose different gasket requirements. A clamp that seals a pinhole cannot restore a structurally weak pipe barrel. That calls for replacement.
Step 1 — Isolate, Expose and Inspect the Damaged Pipe
The repair depends on what the crew can see. A rushed excavation hides essential information.
Make the Worksite Safe
Isolate the line and release trapped pressure under the utility’s procedure. Confirm it at a drain or test point. A closed valve proves little.
Control traffic and protect the excavation. Oil and gas lines require specific permits. Water-main work still needs groundwater controls.
Expose the Full Damage
Expose the complete circumference. Remove loose soil, scale and failed coating. Keep excavator buckets away. A new gouge creates a second problem.
Record Field Measurements
Measure the actual outside diameter at several points. Note ovality and crack length. Photograph pipe markings and nearby fittings. These details beat a catalogue guess based on DN.
Step 2 — Identify the Type of Ductile Iron Pipe Damage
The visible leak is only a starting point. Identify the failure mode before opening a product box.
Localized Pinhole or Small Leak
A correctly sized clamp can suit a small hole when the surrounding wall remains sound. It cannot support a collapsing barrel.
Longitudinal Crack or Split
A longitudinal crack usually needs a full-circle clamp or replacement. Check its length and pipe movement. A narrow split can widen under pressure.
Damaged Pipe End or Joint Area
If the pipe end or socket is broken, cut back to sound material. A coupling can connect the new section. A damaged joint may not offer a stable clamp seat.

Severely Fractured or Unstable Pipe
Do not clamp a pipe that cannot carry operating loads. Replace the section and review restraint. Sometimes the correct repair means more excavation.
Step 3 — Choose the Correct Repair Method
Use field measurements and the condition of the remaining pipe. Keep each product’s role clear.
| Site condition | Potential solution |
| Small localized leak | Mini or full-circle repair clamp |
| Crack extending around the pipe | Full-circle repair clamp |
| Damaged section must be removed | Coupling plus replacement pipe section |
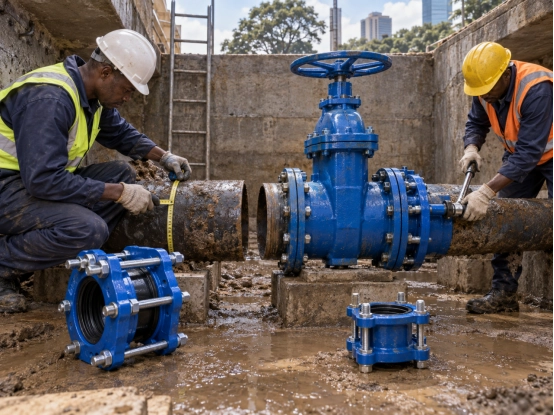
| Connection to a valve or flanged fitting | Flange adaptor or dismantling joint |
| Movement, vibration or settlement concern | Flexible connection product, subject to movement limits |
A repair clamp seals the wall. A coupling joins pipe ends. A flange adaptor transitions to flanged equipment. They are not interchangeable.
Step 4 — How to Install a Repair Clamp on a Ductile Iron Pipe
Installation is a sequence of small checks. Skipping one rarely saves time.
1. Verify the Clamp Before Installation
Confirm the measured diameter falls within the working range. Check pressure rating and gasket compound. Verify potable-water approval where required. Inspect for transport damage.
2. Prepare the Sealing Surface
Remove loose rust, scale and sharp edges. Do not grind away sound wall. The gasket needs an even seat. Never cover unstable metal.
3. Position the Gasket and Clamp
Centre the gasket over the defect and set the clamp evenly. Keep the gasket flat. A folded edge can leak after burial.
4. Tighten the Fasteners Evenly
Hand-tighten every bolt. Use an alternating sequence and specified torque. Watch the gap between clamp sections. If one side closes early, correct the alignment. More torque will not fix the wrong diameter.
5. Test Before Backfilling
Repressurize slowly. Inspect for seepage and gasket extrusion. Adjust only where the instructions permit. Pressure testing belongs before backfilling.
Step 5 — When a Coupling or Pipe Section Replacement Is Better
A clamp is a poor choice when the damaged zone is long, the pipe wall has lost strength or the end is fractured. The same applies when a new valve or fitting must be installed in the line.
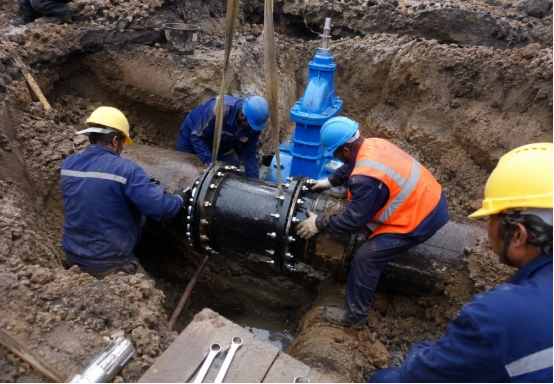
Cut back to sound ductile iron. Measure the replacement pipe. Select a ductile iron pipe coupling that matches the outside diameter. Check restraint before alignment. Never use bolts to drag pipe into position. That loads the gasket unevenly.
Step 6 — Match Conflex Products to the Repair Scenario
Conflex provides connection options for different failure conditions. A full-circle repair clamp can address suitable localized damage. Stainless-steel band designs fit other arrangements. A universal coupling may cover compatible pipe materials within its specified diameter range.
When a plain-ended pipe meets a valve, a ductile iron flange adaptor handles a different problem. Flexible connection accessories belong where movement or vibration has been assessed. The product drawing should control the final selection. Send the pipe measurement, medium and pressure with the inquiry rather than relying on a nominal size.
Final Inspection and Preventive Maintenance
Before the excavation is closed, run through the practical checks:
- Bolt torque and gasket position are recorded.
- The coating has no unprotected damage.
- Pipe alignment and support are stable.
- Thrust restraint is installed where the design requires it.
- The pressure test has passed.
- Backfill will not load the clamp unevenly.
Record the repair location and failure type. Repeated leaks along one corridor may point to pressure transients, poor bedding or construction activity. Replacing clamps without looking for that pattern becomes an expensive habit.
FAQ: Repairing Ductile Iron Pipes
Q: Can a ductile iron pipe be repaired without replacing the whole section?
Yes, when the remaining pipe wall is sound and the damage fits the repair product’s application range.
Q: Is a repair clamp a permanent repair?
It can be durable when correctly selected and installed. Severe structural damage still calls for replacement.
Q: How do I choose the correct clamp size?
Use the measured outside diameter. Nominal DN alone is not enough.
Q: Can a repair be completed under pressure?
Only when the product procedure and trained site team permit it. Isolation and depressurization remain the safer default.
Q:Can I use a standard repair clamp for oval ductile iron pipe?
A:No. Always measure actual outside diameter. Ovality will affect gasket sealing performance.
Q:What gasket material should I select for ductile iron pipe repair clamps?
A:Gasket selection depends on medium (potable water, wastewater, oil or gas). EPDM, NBR and HNBR are common options.
Restore Your Pipeline With the Right Conflex Connection
Good repair work starts with accurate field measurements. Send Conflex your pipe material, actual outside diameter, damage dimension, operating pressure and service medium. Attach site photos if available. Our engineering team will recommend suitable ductile iron pipe repair clamps, couplings or flange adaptors for your project. Download our pipeline repair instructions or contact us for project‑specific technical recommendation.
A flanged connection may suit a different condition. Installation guidance is available through the company’s pipeline repair instructions. For a project-specific recommendation, contact Conflex.


 English
  Arabic
  Chinese
  French
  German
  Indonesian
  Italian
  Kazakh
  Kyrgyz
  Portuguese
  Russian
  Spanish
  Swahili
  Uzbek
Uzbek